Classify
After annotating a sufficient number of windows, you can create a custom classifier trained on these annotations. Then, you can run this classifier on your ARU dataset to be used in downstream processing.
Creating a classifier
To create a custom classifier, run the following command:
perch-analyzer create_classifier \
    --data_dir=<data-directory> \
    --throwaway_classes class1 class2 ... \
    --train_ratio=<training-ratio> \
    --learning_rate=<learning-rate> \
    --weak_neg_rate=<weak-negative-rate> \
    --num_train_steps=<number-of-training-steps>
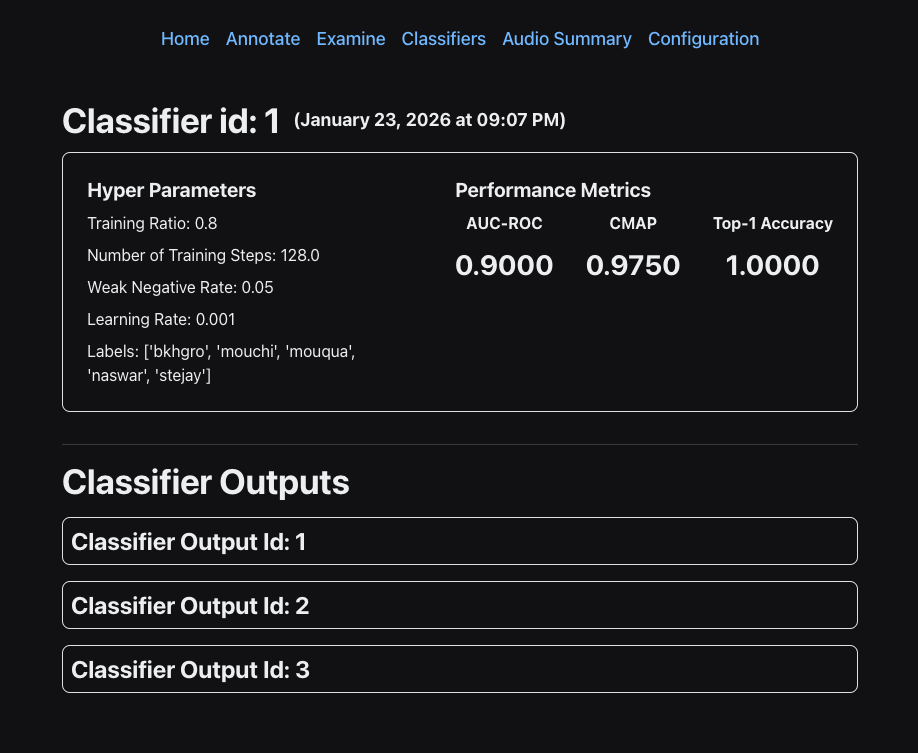
data_diris the directory used to setup a project.throwaway_classesis an optional list of classes (labels) you do not want to train your classifier on. You might have a class called "review" which contains a mishmash of windows containing vocalizations which you cannot identify.train_ratiois the ratio of training to test data used when making the classifier. Defaults to 0.8.learning_rateis the rate at which the gradient descent optimizer will adjust the weights of the classifier. You probably should leave this at the default, which is 0.001weak_neg_rateis the penalty in the loss function to classes not explicitly labeled in a window. The default of 0.05 is probably fine for most use cases. This is why it is important to label all species vocalizing in a given window.num_train_stepsis the number of epochs used during training. The default of 128 is perfectly fine.
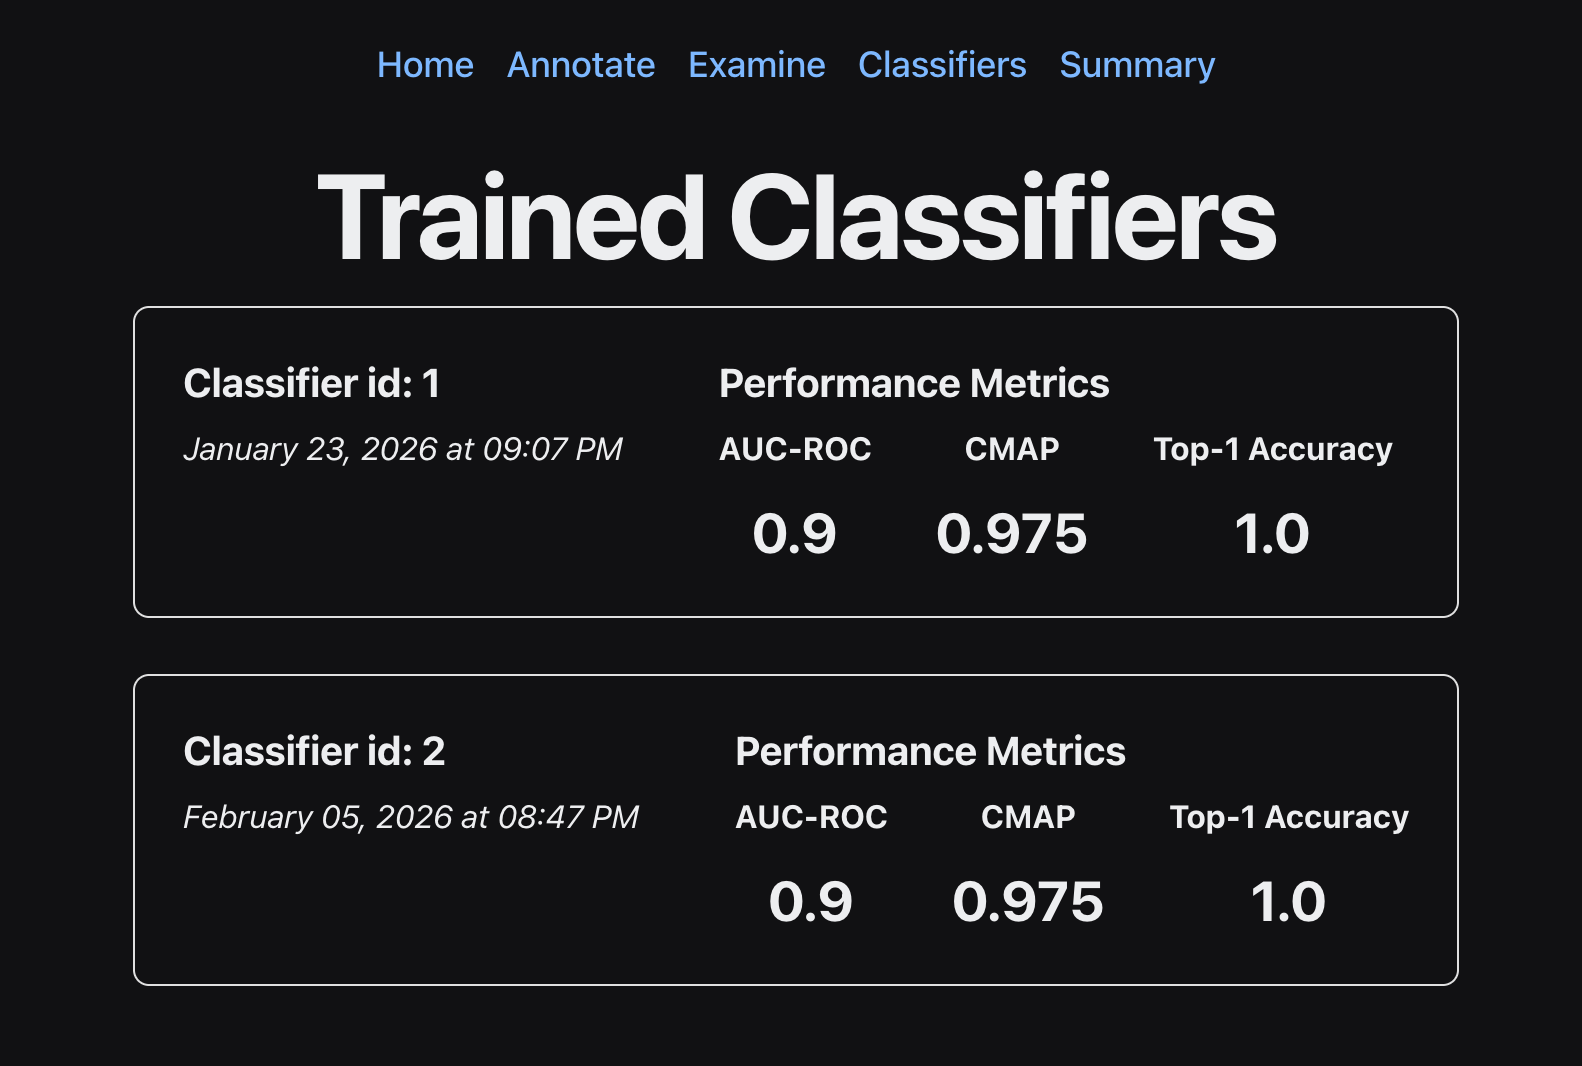
This generates a classifier, which you can run on your ARU data using the method shown below. Because we partition our data into train/test sets, we have metrics on the quality of our classifier. These metrics can be viewed using the Classifiers tab in the GUI.
Running a classifier
After creating a classifier, you can run a classifier on your data using the following command. Note that the classifier id can be found in the GUI under the Classifiers tab.
perch-analyzer run_classifier \
    --data_dir=<data-directory> \
    --classifier_id=<classifier-id>
data_diris the directory used to setup a project.classifier_idis the id of the classifier, which can be found in theClassifierstab in the GUI.
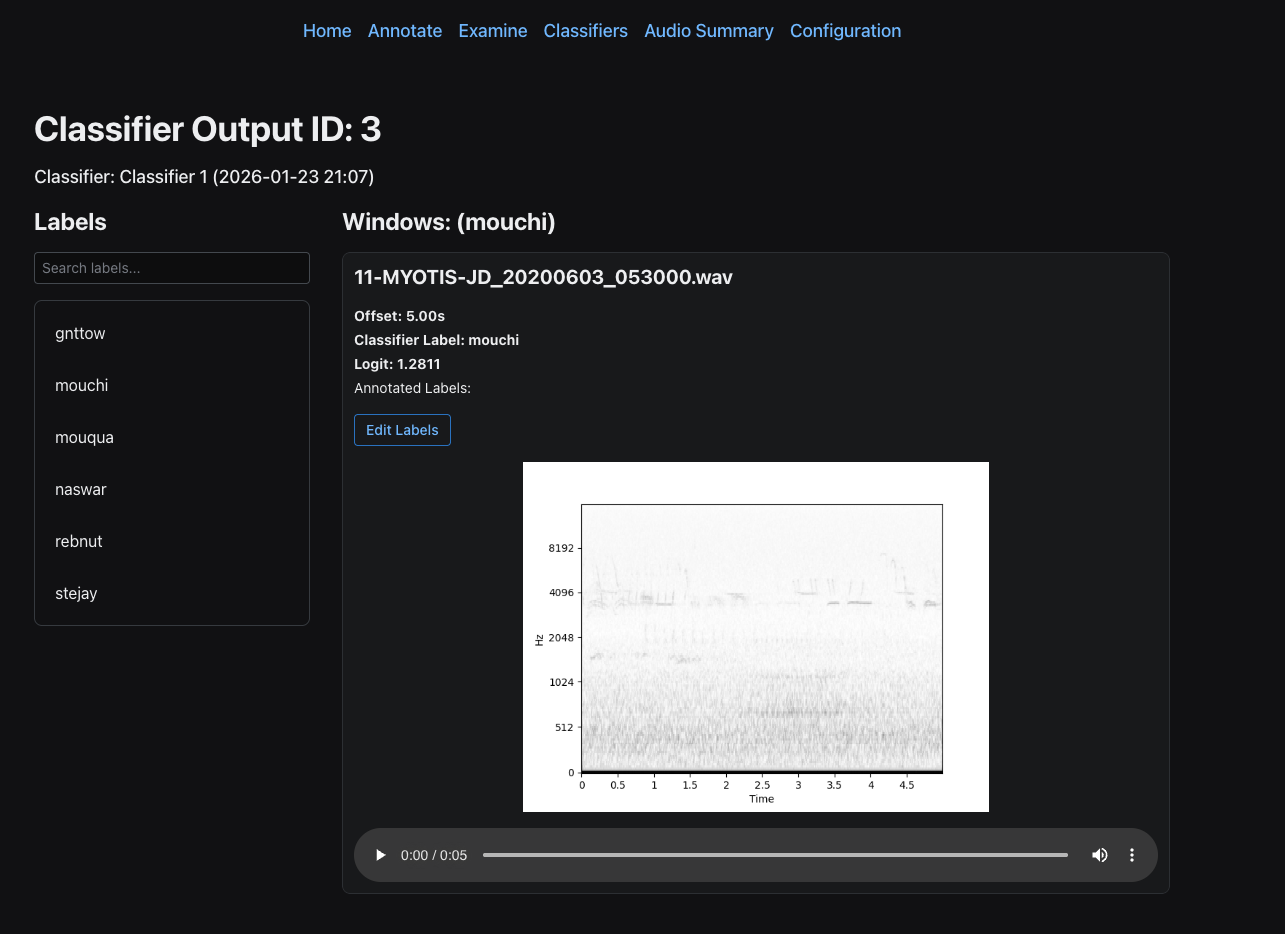
Reviewing classifier outputs
In the Classifiers window, you can click on the classifier to see all of the associated classifier runs (classifier outputs).
Then, you can click on a classifier output to review the actual windows and corresponding logits. To get samples from a classifer output, use the following command:
perch-analyzer gather_classifier_outputs \
    --data_dir <data-directory> \
    --label <label-to-investigate> \
    --min_logit <min-logit> \
    --max_logit <max_logit> \
    --classifier_output_id <classifier-output-id> \
    --num_windows <number-of-windows>
data_diris the directory used to setup a project.labelis the label you want to get classifier outputs for.min_logitis the minimum logit you want to filter the classifier outputs by.max_logitis the maximum logit you want to filter the classifier outputs by.classifier_output_idis the id of the classifier output, which can be found by clicking on a classifier in theClassifierstab in the GUI.num_windowsis the maximum number of windows to sample. Defaults to 1.
This command samples windows from the classifier output within the specified logit range, allowing you to review and validate the classifier's predictions for a particular label. After gathering classifier outputs, they will appear in the GUI under the corresponding classifier outputs page.